How to Change License Plate Bulb on Your Car

November 19, 2020Car Tips and Tricks
Anastasia Hill

Apart from being the next fashion icon, Anastasia is also a freelance writer and expert on moving (and packing clothes).

If you want to learn how to change license plate bulb on your car, you have come to the right place. To avoid being pulled over and risk paying a ticket, you need to have them working correctly. Keep reading to find out more about how to replace license plate light and be fully prepared for the road.

Whether you’re preparing to ship a car cross country or just want to drive down the famous routes in the USA, replacing these lights is essential for every driver. Firstly, let’s see why these bulbs are so significantly important.

Give USA Auto Transport an Ask for a Free Quote

GET A QUOTE

Before Learning How to Change License Plate Bulb

You have maybe set your eyes on some of the most popular imported cars and purchased one, but now wondering about the lightbulbs and searching for the ways to change them. If you didn’t watch that many TV shows about cars, you will probably not be familiar with their significance. They are actually an essential piece of your car’s lighting system. They are allowing other drivers to see you and helping police and cameras to identify your license plate. If these light bulbs burn out, you could be pulled over by the police and end up paying a fine. When these are not working anymore, you should remove them and install new ones as soon as possible.

Whether you’re debating between classic cars VS modern cars, know that older vehicles could have incandescent bulbs. They are less bright and less efficient than LED ones. If you have an older car, we suggest you replace their bulbs with the latter. They will save you some dollar bills in the long run since they last much longer than the older ones.

Are All License Plate Lights the Same?

Are you wondering whether they are all the same size and can fit into any car? Actually, there are different types for different vehicles. We highly recommend you remove yours when they stop working and take your vehicle to get new ones.

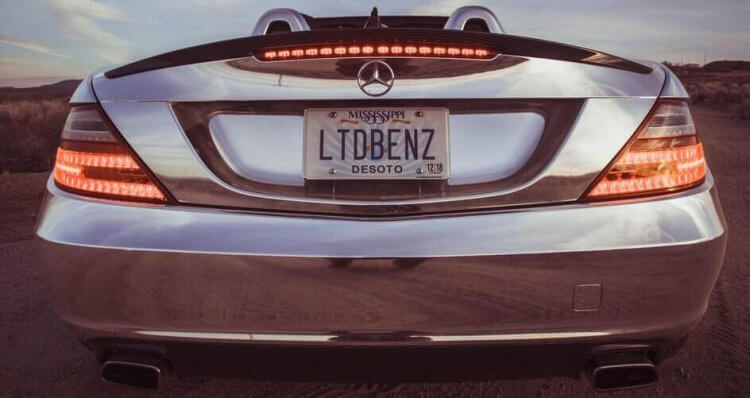
An image of a silver Mercedes Benz on the road
Not all lightbulbs are the same

How Do I Know if My License Plate Light Is Out?

These lamps are attached above the plate’s rear frame and illuminate it in a downward direction. Yet, since this is placed in the rear of the car you’re driving, it’s highly possible that you simply won’t know if the problem exists until a police officer pulls you over. Nowadays, many trucks, cars, and SUVs have several sensors, computers, and monitoring devices that relay the potential issues to the person driving a vehicle. This technology, unfortunately, doesn’t include license plate lamps. Still, there are ways to check them. To avoid road rage from other drivers or driving anxiety, be sure to inspect these lamps before jumping into your vehicle.

If the Light Is Flickering Off and On, You Need to Replace It

These lamps should activate when you activate the headlights, including the parking ones as well. Remember that they are solid lights that could be either on or off. In many cases, however, they can start flickering. Such a situation can commonly happen due to a loose cable or connection. Flickering lamps can be highly dangerous and distracting to other drivers on the road. Not to mention that you’ll be attracting the police officer’s attention and most likely get a ticket.

To avoid driving stress and a situation such as this one, you should walk around your car once every week. Do this before a night drive. Just turn on your headlights, walk around your vehicle, and make sure these rear lamps are solidly illuminated. If you see flickers, go to a local mechanic or keep reading this article and find out how to change license plate light yourself.

If Your Rear Bulb Seems Foggy

Another signal of a potential issue is when the illumination appears foggy. Such a situation is most likely caused by water or condensation trapped within the light’s lens cap. Water can be leaking from the vehicle’s trunk lid inside the light’s lens when it is cracked. This is causing foggy illumination. As with the flickering, fogginess can lead to distraction on the road, and thus, you should replace the lightbulb and the light lens. Also, make sure that condensation or water is removed before it causes a short circuit because it can damage other systems inside the vehicle. With all other routine maintenance costs, you’ll be good without that particular one.

If Lamps Are Not On When the Headlights Are Turned On

The most obvious indicator of something being wrong is when the lamp is not lit when the headlights are on. This indicates that there’s either a problem with a loose connection, relay switch, or that the lamp has simply burnt out and had to be replaced. As we mentioned earlier, you should remove it and go to an auto parts store to get the right one and replace it.

A white car on a parking lot during the night
If rear light bulbs are flickering or if they appear foggy, they should be replaced

How to Replace License Plate Light Bulb?

Apart from knowing how to use a tire repair kit or how to change a flat tire, you should also learn how to replace tag lights. Before we start with our step by step guideline, be sure to prepare the following materials needed for fixing the lightbulbs:

  • Protective gloves
  • Flashlight
  • Screwdriver
  • Replacement license plate light bulb.

Replace Both Lamps at the Same Time

You should remove both tag lamps at the same time. If one has burnt out, the same will happen with the other one soon, regardless of maintenance. Firstly, be sure to check what kind of a lamp is available for your model and look up if your local auto supply store has it. As we mentioned, it’s suggested to obtain LED instead of incandescent lightbulbs. They usually cost around $2 to $3.

The Screws on the Vehicle’s Light’s Covers Should Be Loosened

The lamps are located above the license plate, close to the latch which opens your vehicle’s trunk. Look for screws that are holding the covers to your car and use a turnscrew to spin them counterclockwise. When you loose the screws, you’ll see the lightbulbs underneath the covers. During this process, it’s important to remember that the covers could also have attached rubber gaskets. They must stay attached to covers. Otherwise, water could leak into the lightbulbs and cause it to short out.

If the Lights’ Bases Are Attached to the Bumper, Rotate It From Underneath

All lamps attached to the back bumper typically don’t have screws. That is why you will have to go underneath your car and search for the black wires that will lead to circular ports on the bumper back. Rotate wires bases counterclockwise in every one of the ports and pull them out to access the lightbulbs. Remember to prepare a flashlight and use it to find the wires.

Pull the Lightbulbs Straight Out

The next step is to pull the lightbulbs gently in order not to break them. Grab them straight out from the bases. If the lamps aren’t coming out, you should search for metal or plastic tabs that are holding them in place. For the lightbulbs to come loose, press down on the tabs. It is crucial to remove the lightbulbs while your car is not running. Otherwise, you could get shocked.

New Tag Lights Should Be Pushed Into the Slots

Wearing cotton gloves while handling the new tag lights is extremely important. That way, you won’t damage or smudge them. Align them, so the prongs on the bottom are lined up with the holes in the bases. After that, you should push the lightbulbs into every base until they are securely placed. Remember not to force the whole process, or else you’ll shatter them.

Turn Your Car On and Check if the Lamps Are Working

Before you start placing the covers back on and securing the bases, start your car and turn on the headlights, and then check if the tag lights are lit. That way, you’ll be sure if the repairs worked. If they turn on, be sure to turn off your car so that you can keep on working. If they are not lit up, there might be an issue with your car’s wiring. In such cases, find a mechanic.

Secure the Lamps by Reattaching the Covers

Place the covers back above the lightbulbs so that the screw holes are lined up. Turn the screwdriver clockwise and tighten the screws back towards the covers. Once you attach the covers, the repair is done. In case you had to get out the bases from the car’s bumper, slide the bases back and turn them clockwise in order to secure them. And now your question — How do you fix a license plate light? — has been answered.

YouTube video

How Do You Change a Car Interior Light?

Interior lamps usually collect plenty of grime and dust over time, which lowers their brightness. Since you’re already here, let us help you with some guidelines on how to remove your car interior lamps as well:

  • The first thing you should know is to take precautions during the removal process. Be sure to wear gloves and avoid any contact with cleaning solutions. That way, you’ll prevent an allergic reaction to your skin. You should also be careful about not touching the halogen bulbs because it will damage them and reduce their working life.
  • There are two types of car interior lights: snap-on mechanism and Phillip screws. If you use snap-on covers, budget it out with a flathead screwdriver. Carefully wriggle the screwdriver around til the cover falls out. In case you have a Phillips screw attachment system, use a Phillips head screwdriver and undo screws to clear away the cover.
  • To remove interior lightbulbs, you’ll have to use a cloth to get them out from their sockets. As mentioned, avoid skin contact with halogen bulbs. Take the screws off by twisting them in a counterclockwise direction. After this, you can move on to cleaning the cover and sockets.
  • Put your gloves on and spray liquid cleaner on the covers. Scrub off the grime with a soft cloth for cleaning. Paper towels should be avoided because they can scratch the plastic covers. Spray cleaning solution on the cloth and clean the insides of the socket where the bulb will be installed.
  • Reinstall the lightbulbs following the steps mentioned above in reverse order. After finishing the whole process, be sure to activate your car’s interior lights and see if there’s a difference in brightness.
A man in the car in front of a McDonald's restaurant
You're doing yourself a giant favor by fixing your vehicle's interior bulb

What Should You Know if You’re About to Move Your Car Long-Distance?

Have you maybe gone through the process of changing your lightbulbs to prepare a car for shipping to a new destination where you’ll be relocating soon? Consider hiring a reputable car shipping company that can offer both open and enclosed trailer services. Furthermore, professionals can provide you with door to door auto transport and terminal to terminal car shipping. Car transport open VS enclosed? If you’re wondering which one is safer, know that besides transporting cars from state to state, a professional auto transport company can offer valuable car shipping advice as well. Whether you opt for enclosed auto transport or open carrier auto transport, find the cheapest way to ship a car, and look up how to register your car in a new state. Laws differ from state to state. Thus it’s crucial to do your research on time. And remember to drive safely

Get a Quote

    check mark
    Download as PDF

    Moving Checklist

    Get a Free Estimate 855.675.3451